How to Use a Boston Shaker: A Step-by-Step Guide
BarNeedLooking to craft the perfect cocktail? The Boston shaker is undoubtedly an essential tool for both bartenders and cocktail enthusiasts. While it may have a simple structure, mastering its use is key to achieving the best taste in your cocktails.
If you're not yet familiar with the basics, you might want to view our other article, What is a Boston Shaker: The Ultimate Guide. Here, we’ll dive further into its techniques and usage tips to help you get started with ease!
Jump to:
Introduction to the Boston Shaker
Before we dive in, let’s get a quick overview.
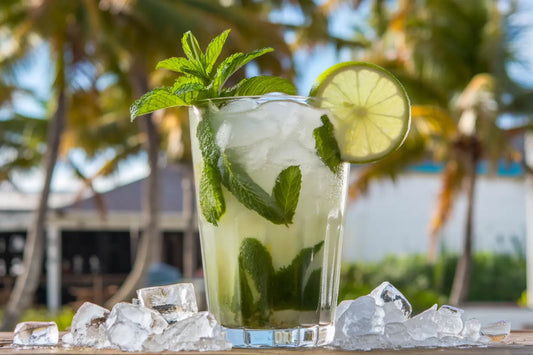
The Boston shaker originated in the United States in the 19th century and began gaining popularity around the 1850s. It typically consists of two parts: a larger metal tin and a smaller metal tin. Its simple design and practical features make it perfect for quickly chilling and blending drinks. Bartenders often pair it with a Hawthorne strainer to remove excess ice or fruit pulp.

How to Use a Boston Shaker
You’ve probably seen professional bartenders in bars or in movies using the Boston shaker to make impressive drinks. While their dazzling techniques may leave you in awe, they can also make you feel that cocktail-making is out of reach. But don’t worry—you only need to learn how to use it to mix drinks, not how to perform fancy tricks.
So, learning to use it isn’t actually that difficult, and with a bit of practice, most people can quickly grasp the basic operation. As a result, it’s an ideal choice not only for professional bartenders but also for home bartending enthusiasts and beginners alike.
Step 1: Gather Your Ingredients
Start by preparing the base spirits, juices, syrups, and any other ingredients needed for your cocktail, along with some ice. In addition to the shaker, a jigger can help with precise measurements of each ingredient, and a Hawthorne or Julep strainer for filtering out any solids when pouring the drink.
It’s also essential to clean your tools before first-time use, especially if they’re newly purchased, to remove any bacteria or odors from the manufacturing process.
Step 2: Add Ingredients and Ice
Following the recipe, add the ingredients to the large tin, then add a suitable amount of ice.
You may wonder, what’s the right amount of ice? Great question! The amount and size of ice directly affect the cooling speed, dilution ratio, and taste of the cocktail. Here are some tips:
- Quantity: Filling 2/3 or 3/4 of the shaker is common, as this amount cools the drink quickly while providing optimal dilution.
- Large Ice : These melt slower, helping to keep the drink crisp and pure.
- Standard Ice: Ice cubes from a regular tray are ideal for general use, providing a balance of cooling and moderate dilution in a short time.
- Crushed Ice: This melts quickly, offering rapid cooling and higher dilution. However, it isn't suitable for all cocktails, especially when you want to maintain a rich flavor.
Ultimately, adjust the amount and type of ice according to your preference and the recipe. For example, a martini typically requires less, whereas spirit-forward drinks may benefit from a bit more.
Step 3: Assembling the Shaker
Place the small tin over the large one, pressing or tapping lightly on the bottom of the small tin to ensure a good seal. If you're unsure whether they're sealed, try lifting the small tin to check if they separate.
However, avoid sealing too tightly, as this can make it difficult to open afterward.
Step 4: Proper Grip and Shaking Technique
Hold each end of the shaker firmly with both hands. If you’re confident in your control, you can hold it single-handedly at the joint. Tilt it at a 45-degree angle—this allows the liquid to make better contact with the ice, incorporating more air during the shake, resulting in a smoother, silkier cocktail.
Shake for about 10-15 seconds, until the exterior develops a mist or feels cold. This duration is key to achieving the ideal balance between temperature, dilution, and flavor.
Step 5: Separating the Shaker
After shaking, stand it upright on a table and open it. If it doesn’t separate easily, try gently tapping the side of the shaker or giving it a slight twist.
Step 6: Straining with a Strainer
Place the strainer over the shaker’s opening and pour the prepared cocktail into a glass, effectively filtering out any ice or fruit pulp for a cleaner taste. Of course, if you prefer a more rustic texture, you can skip the straining.
And there you have it—you've mastered all the beginner techniques for using a Boston shaker and crafted your first delicious cocktail. Cheers!

Additional Tips and Tricks
Pre-chill: Before making a cold drink, you can shake a few ice cubes in the shaker for a few seconds to cool it down. This way, the drink will chill more quickly during the actual shake, keeping the flavor crisp and refreshing.
Straining Without a Strainer: If you don’t have a strainer on hand, you can press the small tin against the large tin, leaving a narrow opening for the liquid to flow out while blocking most of the ice and fruit pulp.
Substitute for Mixing Glass: When making cocktails like martinis or negronis that are better stirred than shaken, the shaker tins can serve as an alternative to a traditional mixing glass.
Container for Muddling Ingredients: It can also be used as a container for muddling fruits, herbs, and other ingredients. The stainless steel material can withstand the pressure from the muddler without breaking.